How to mount the Honeycomb Bravo in FV6HAB and FV9HAB panels
Since the Honeycomb Bravo is going to be shipping out soon, we thought it would be good to go over how to install it in our first generation FV6HAB and FV9HAB panels. We'll be showing the FV6HAB in this post, but the procedure is the same for both panels. So let's get right to it, shall we?
Step 1
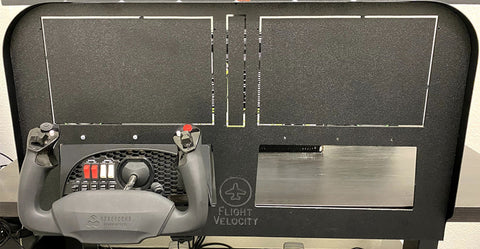
Cut out the blank on the right side of the panel at the points shown below. If your panel is already installed, there is no need to remove it from the desk to remove this blank.

The result should look like this -
Step 2
With the panel mounted on the desk locate the mounting plate from the Bravo throttle quadrant. We'll be using this plate WITHOUT the mounting brackets. Instead, we're going to use the micro-suction pad that is already affixed to the bottom of this plate.
Peel the backing from the micro suction pad, ensure the desk surface is free from dirt and debris, and place on the table directly behind the Bravo hole that you've opened up in step one. Spacing is important here, and the mounting plate should protrude 3/4" beyond the edge of the desk.

Step 3
Slide the Bravo through the hole in the panel ensuring that it clicks into place on the central mount point on the mounting plate. You'll likely need to slightly adjust the placement of the panel and Alpha to get everything aligned perfectly.
Next install the bracket to the top of the Bravo and the back of the panel with the hardware that came with your panel. This is the second rectangular bracket with the green dot on it.

